1 How to Take Screenshots with the Microsoft Snip and Sketch App2 How to Take a Screenshot in Windows 10 with the Snip & Sketch Action Center Button3 How to Use the Snipping Tool in Windows 10 via the Snip and Sketch Shortcut4 How to Draw On and Edit Screenshots with Snip & Sketch
Where is the Snipping Tool in Windows 10? Windows 10 has two built-in screenshot softwares – the snipping tool, which is from Windows Vista, and the more modern ‘Snip & Sketch’, which arrived with Windows 10 version 1809. Though you can still access the Snipping Tool on Windows 10 by simply searching, we instead recommend its more modern counterpart. Why? Well, on the whole Snip and Sketch is simply faster, better integrated, and has additional annotation and editing options. Still, as it’s new, we understand you may need some guidance on using it effectively. As a result, in today’s tutorial, we’re going to show you how to use Snip and Sketch in Windows 10 to take a screenshot.
How to Take Screenshots with the Microsoft Snip and Sketch App
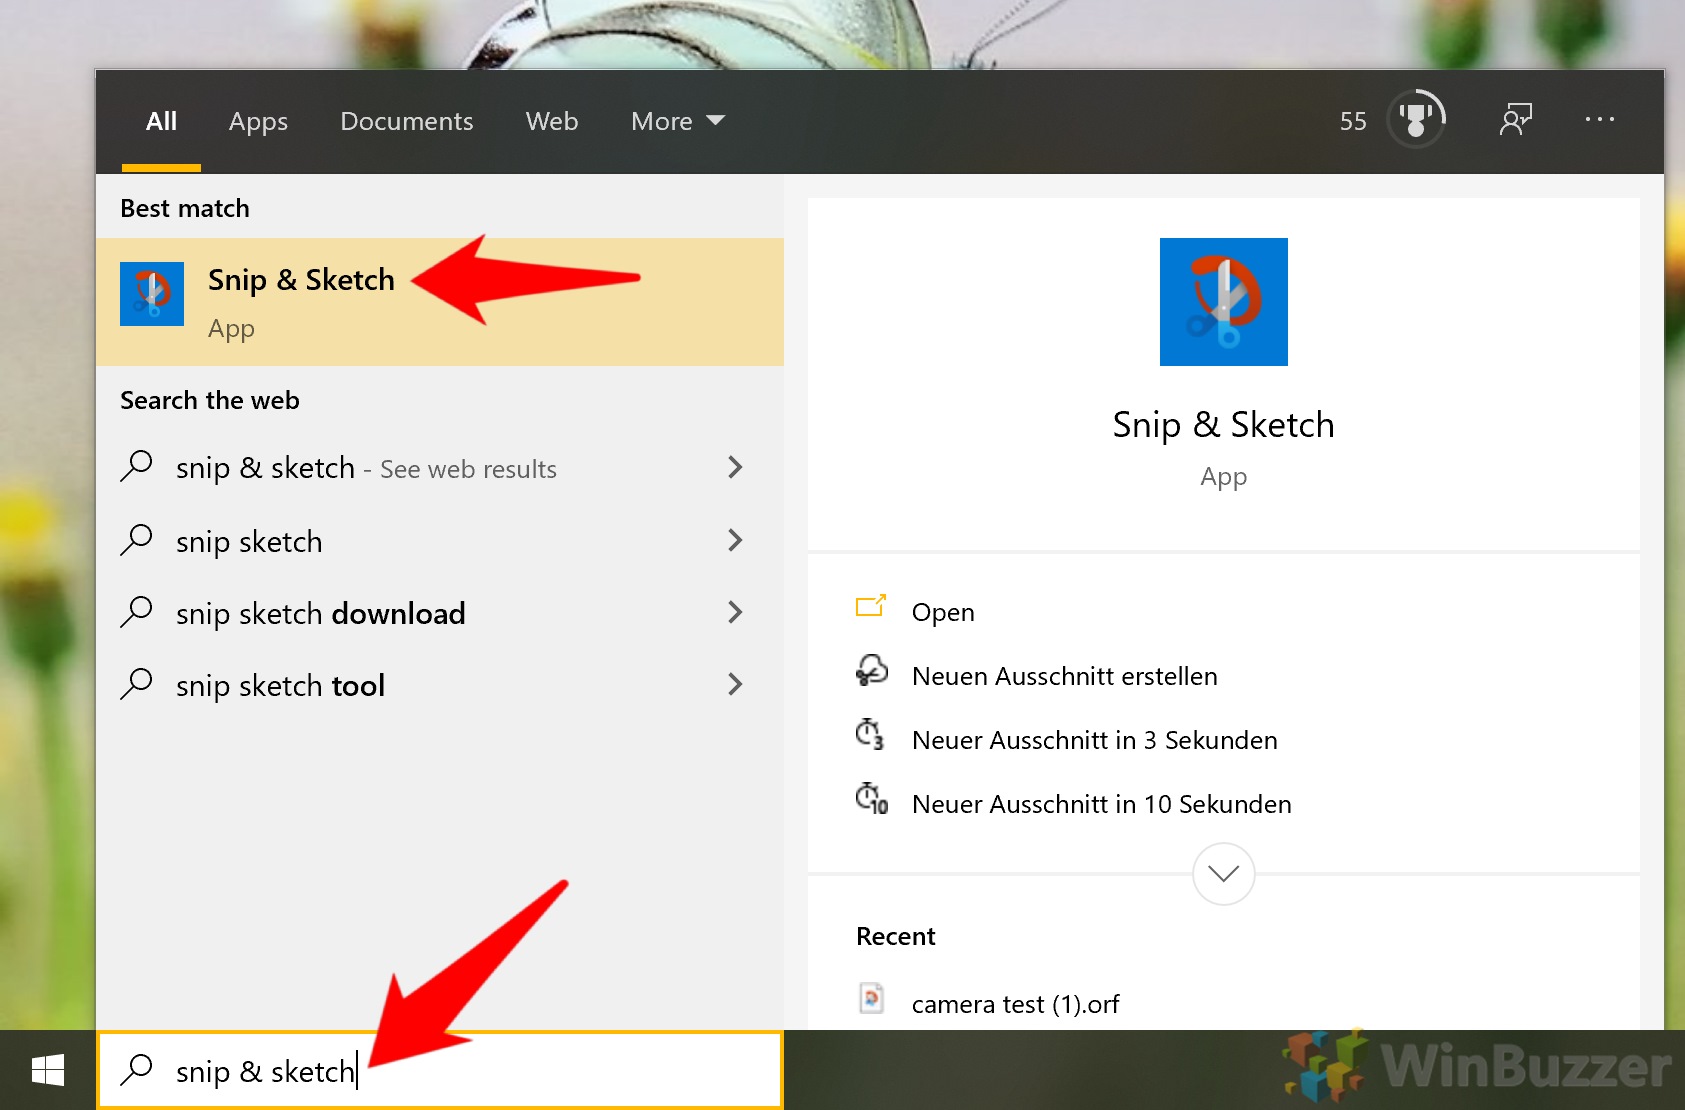
The slowest but simplest way to take a screenshot is via the dedicated Snip & Sketch app. You can find this as you would any other app.
How to Take a Screenshot in Windows 10 with the Snip & Sketch Action Center Button
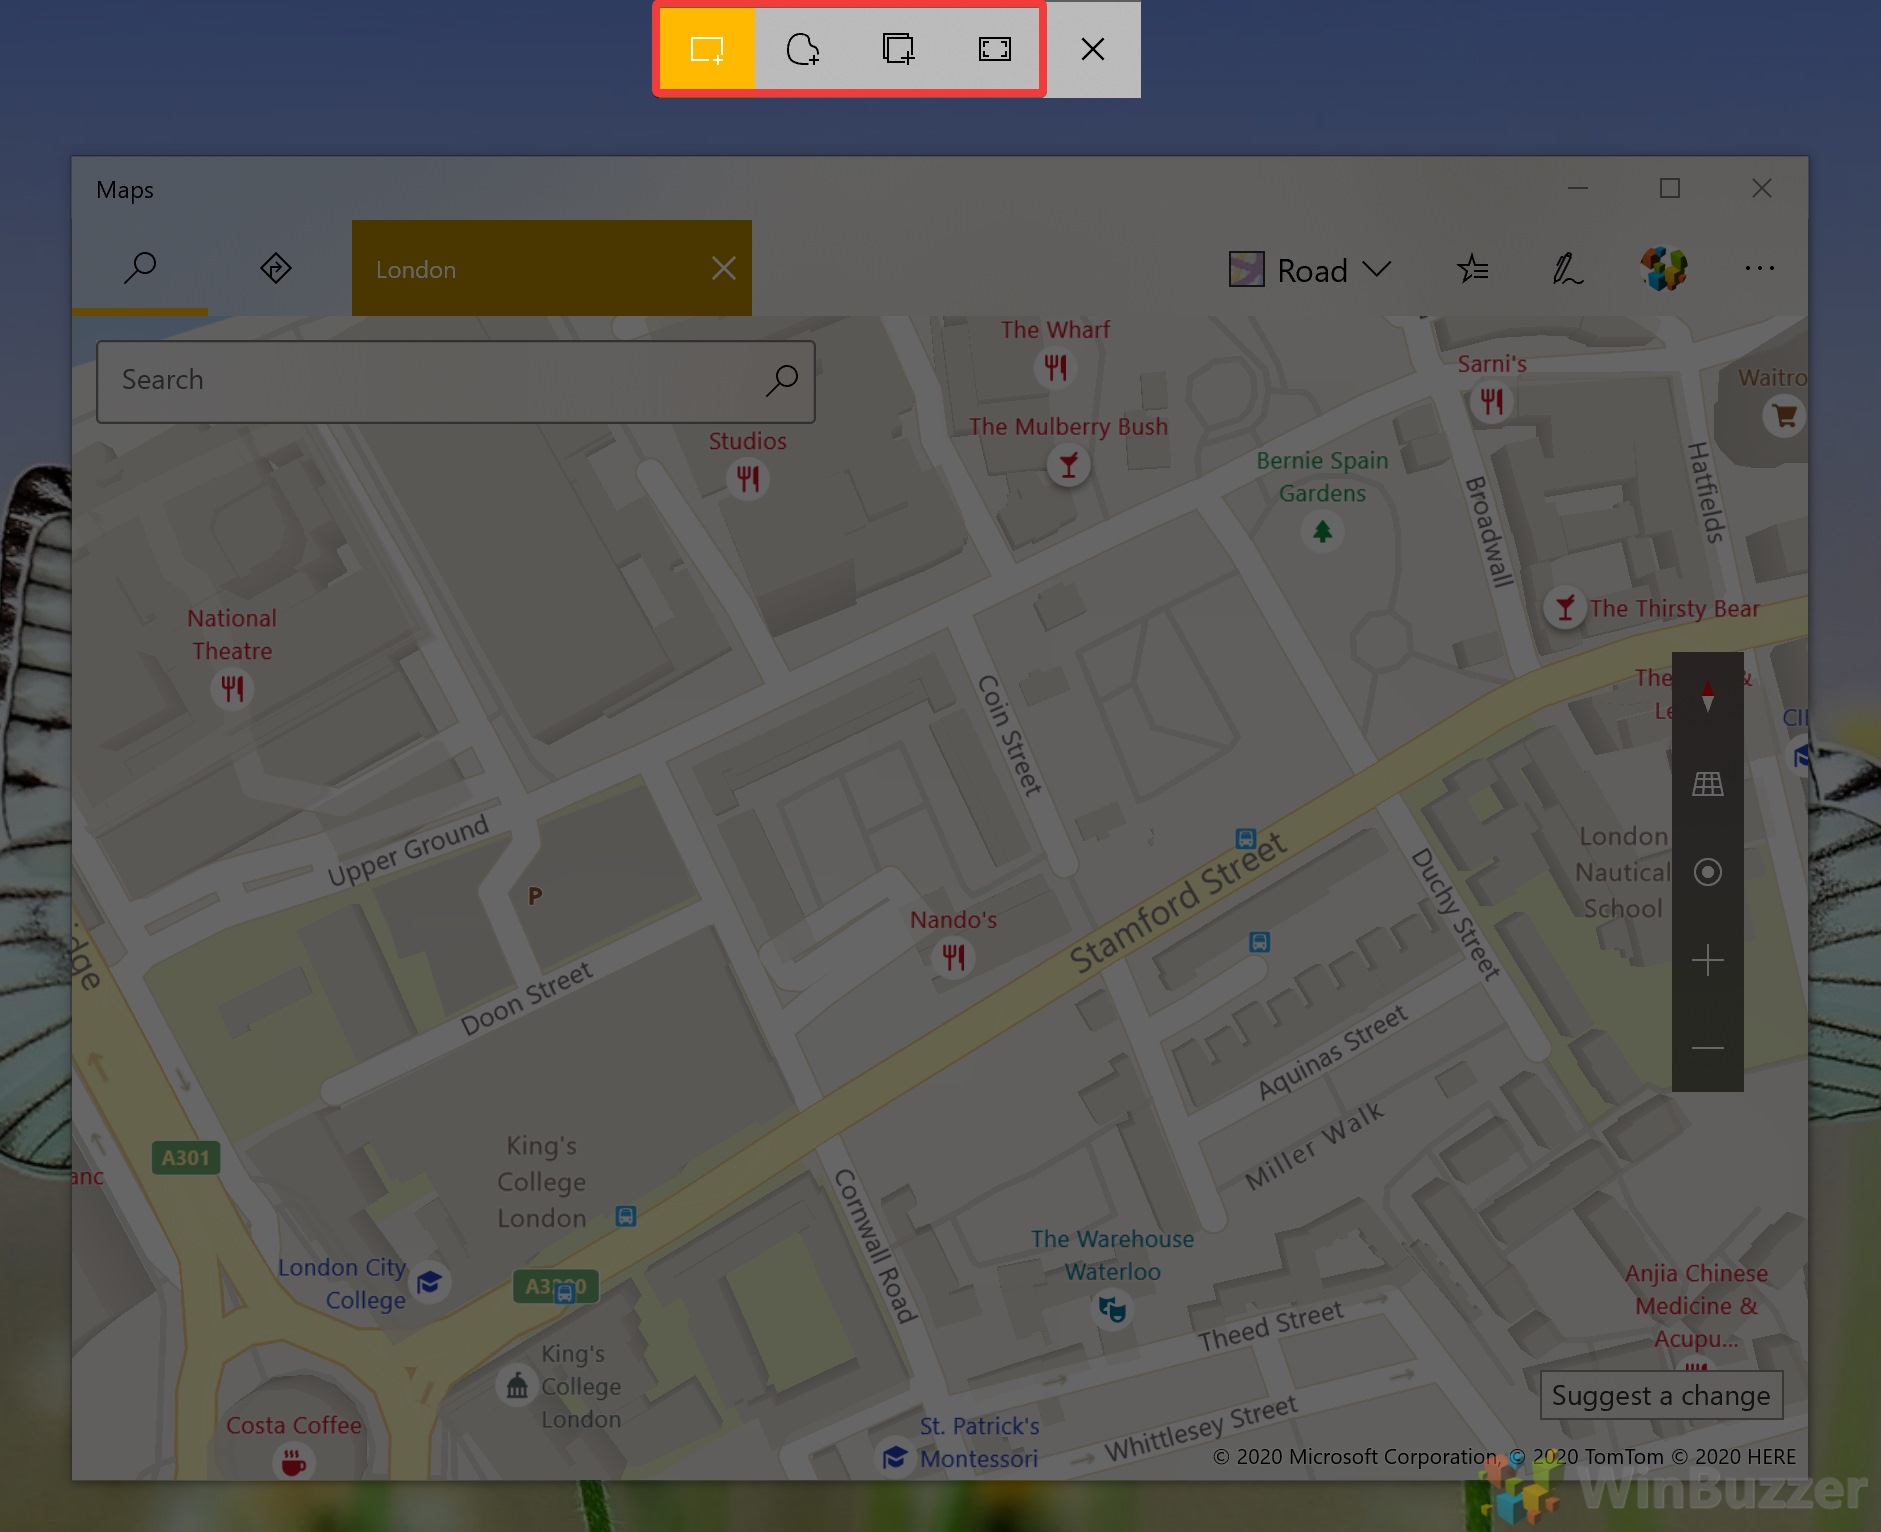
If you’re looking for something a bit more intuitive, you can instead access the Snip and Sketch interface via the Action Center. Snip and Sketch’s snipping tool will appear at the top of your screen for you to use. You can see what each screenshot option does by hovering over its icon. Here’s a quick rundown from left to right:
Rectangular snip: Take a screenshot of a specific area of your screen by dragging a rectangular box over it. Freeform snip: Take a screenshot of an area of your screen by drawing any shape you like. Window snip: Quickly screenshot an entire window by clicking anywhere on it. Fullscreen snip: Screenshot your entire desktop, including any secondary or tertiary monitors.
How to Use the Snipping Tool in Windows 10 via the Snip and Sketch Shortcut
The eagle-eyed among you may have noticed from the first section of this tutorial that you can access Snip and Sketch even faster – via a Snip and Sketch shortcut. For those of you who missed that, it’s Shift + Windows + S.
Rectangular snip: Take a screenshot of a specific area of your screen by dragging a rectangular box over it. Freeform snip: Take a screenshot of an area of your screen by drawing any shape you like. Window snip: Quickly screenshot an entire window by clicking anywhere on it. Fullscreen snip: Screenshot your entire desktop, including any secondary or tertiary monitors.
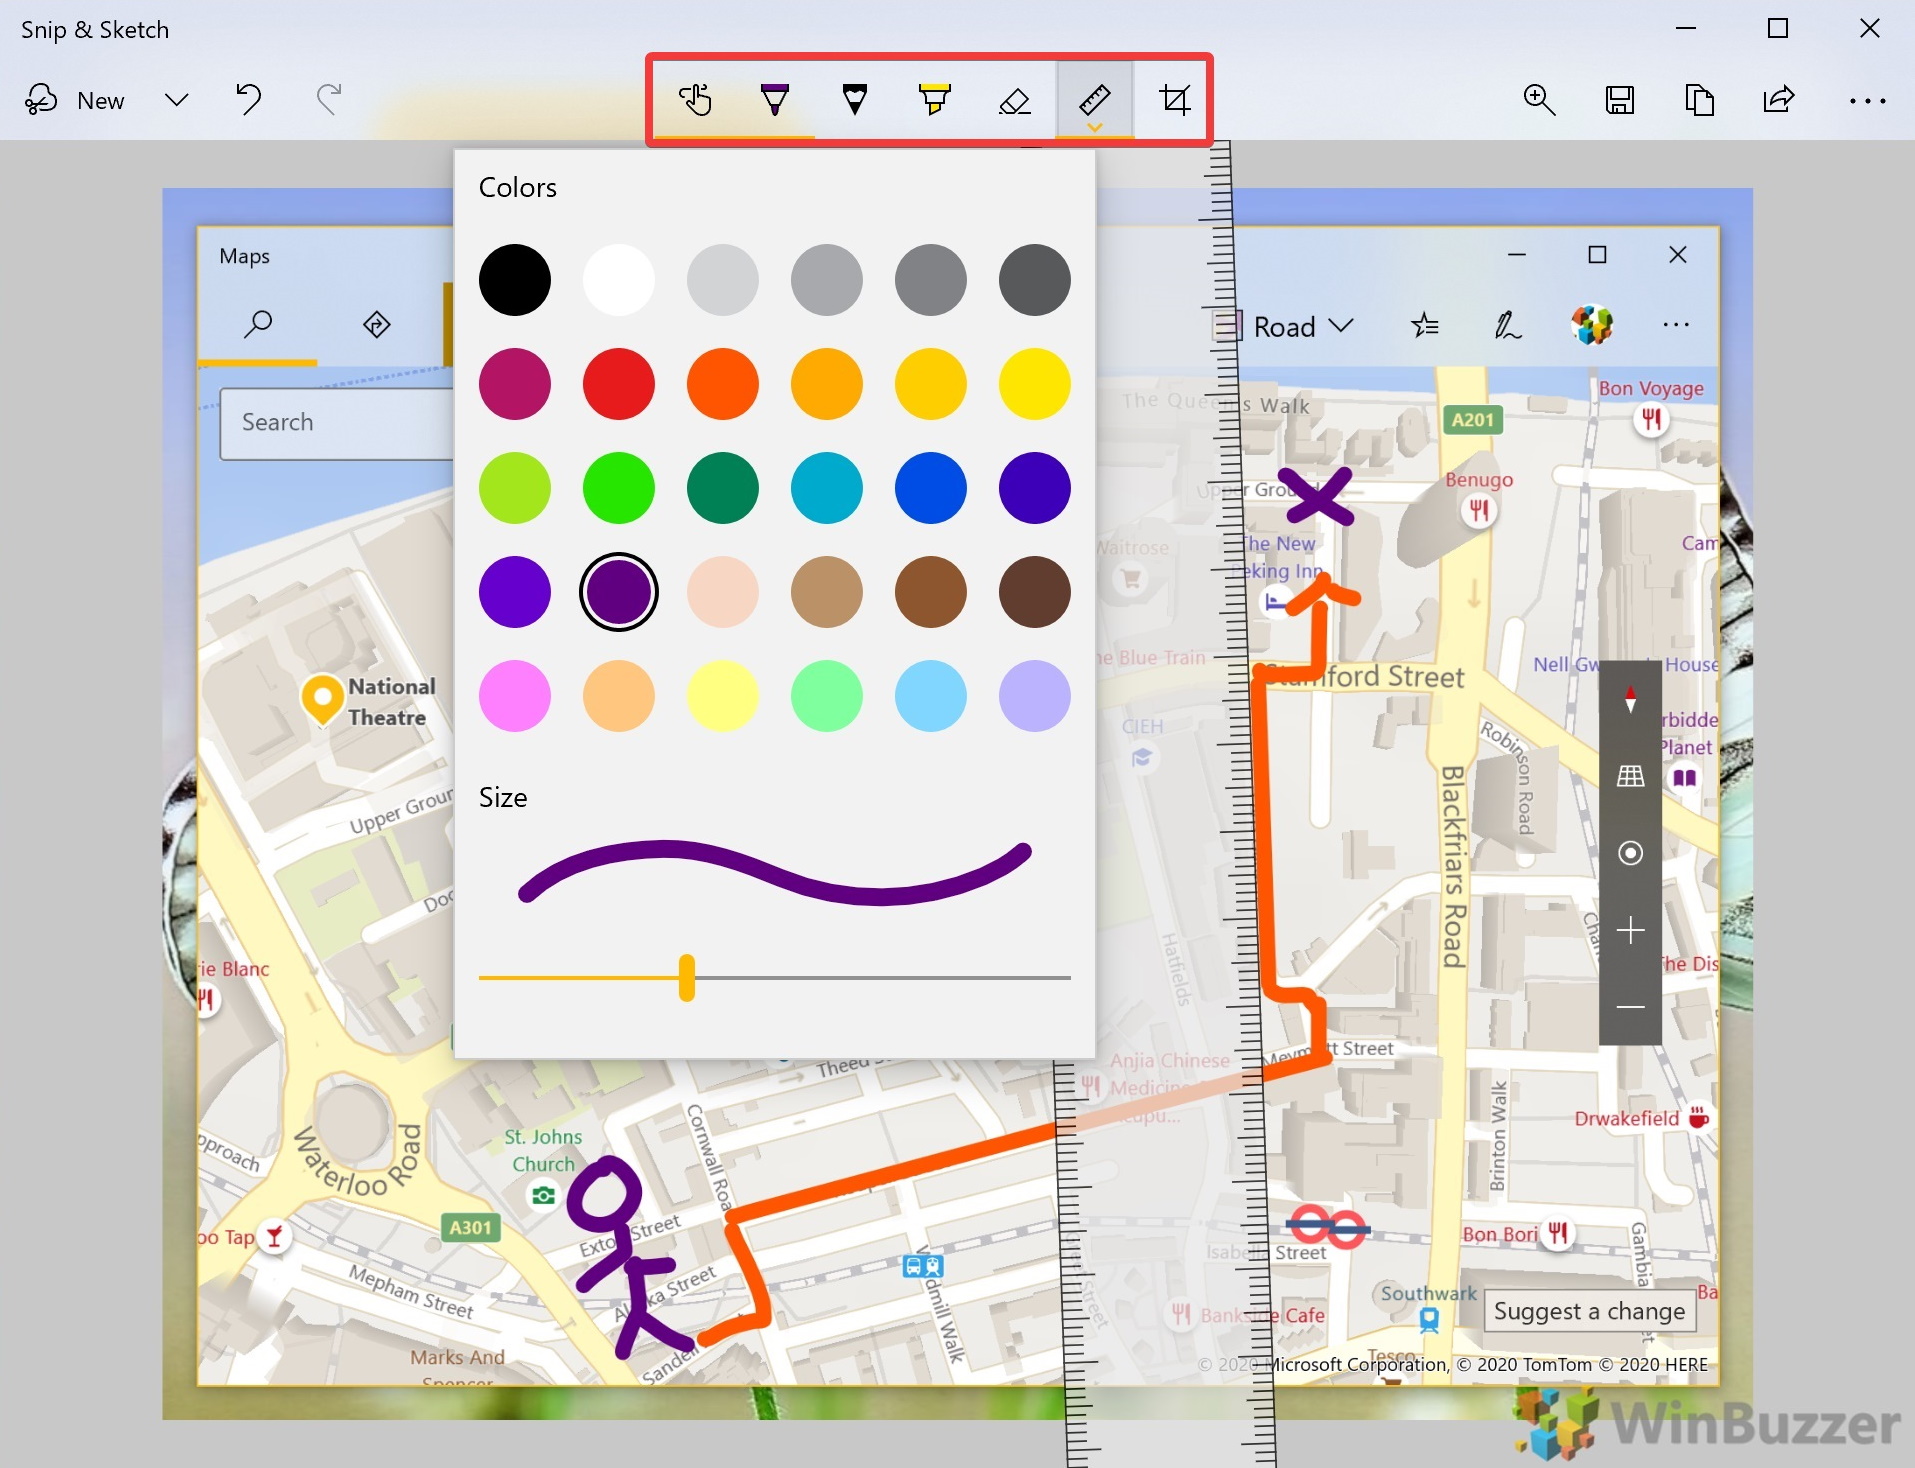
How to Draw On and Edit Screenshots with Snip & Sketch
We’ve covered the “Snip” part of Snip and Sketch in detail, so now let’s cover that second part. One of the nicest things about this tool is that it lets you easily draw on screenshots in Windows 10. You can also use it, to a lesser extent, to edit screenshots, performing basic cropping and straightening.
Rectangular snip: Take a screenshot of a specific area of your screen by dragging a rectangular box over it. Freeform snip: Take a screenshot of an area of your screen by drawing any shape you like. Window snip: Quickly screenshot an entire window by clicking anywhere on it. Fullscreen snip: Screenshot your entire desktop, including any secondary or tertiary monitors.
Touch writing: A thin, pencil-like black brush, specifically optimized for writing on the screen. Ballpoint pen: A regular brush with various thicknesses and color options. Pencil: A thin, slightly textured black brush with color and thickness options. Ruler: Places a virtual ruler on your screen so you can easily tell the angle of something. Use the scroll wheel to rotate it. Crop: Make your smaller to suit your preferences.
We’ll cover the final option, crop, in more detail below.