1 How to Make a Hanging Indent on Google Docs via the Format Menu2 How to Indent the Second Line in Google Docs with the Ruler3 Google Docs: How to Make a Hanging Indent with a Keyboard Shortcut4 Extra: How to do a Hanging Indent in Microsoft Word5 Extra: How to Change Default Line Spacing and Font Size in Google Docs
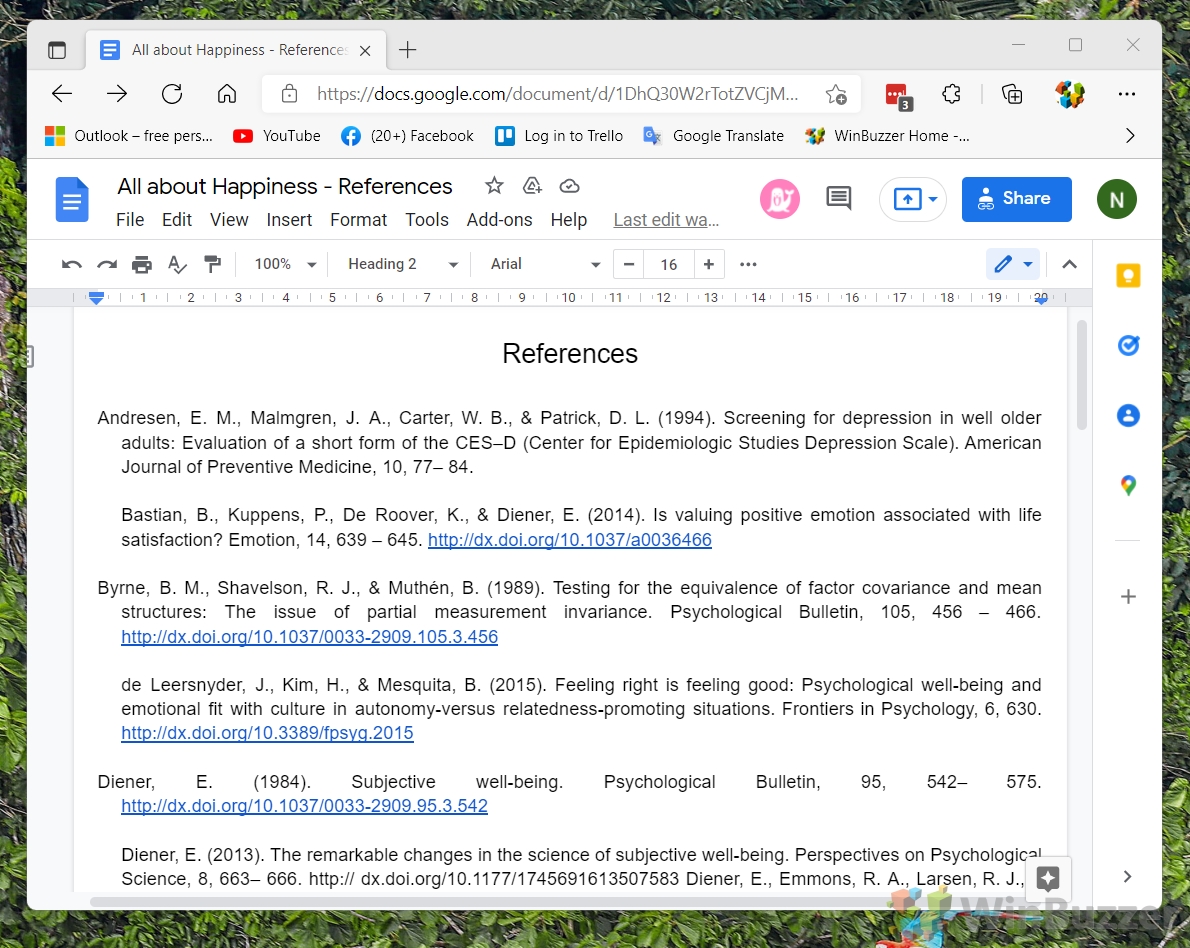
What is a hanging indent? A hanging indent, sometimes called a second line indent, is the practice of offsetting the second and subsequent lines of a paragraph. This indentation is typically five spaces, which translates to half an inch. Hanging indents are most used in the bibliography in academic papers to allow the reader to easily see the breaks between citations. You can see the difference between a regular paragraph and one with a hanging indent below:
You can therefore create a hanging indent in Google Docs by adjusting your indentation options to indent by a quarter of an inch. There are three main ways to do this:
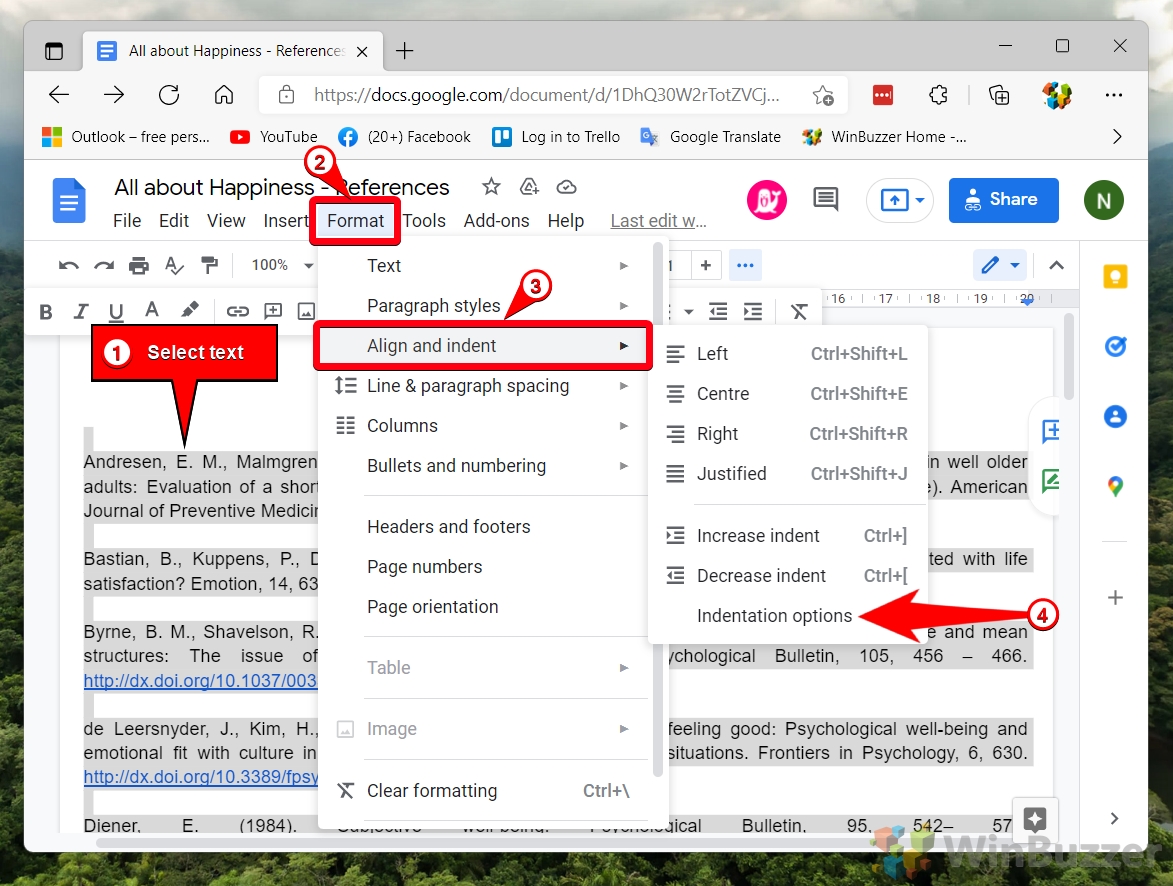
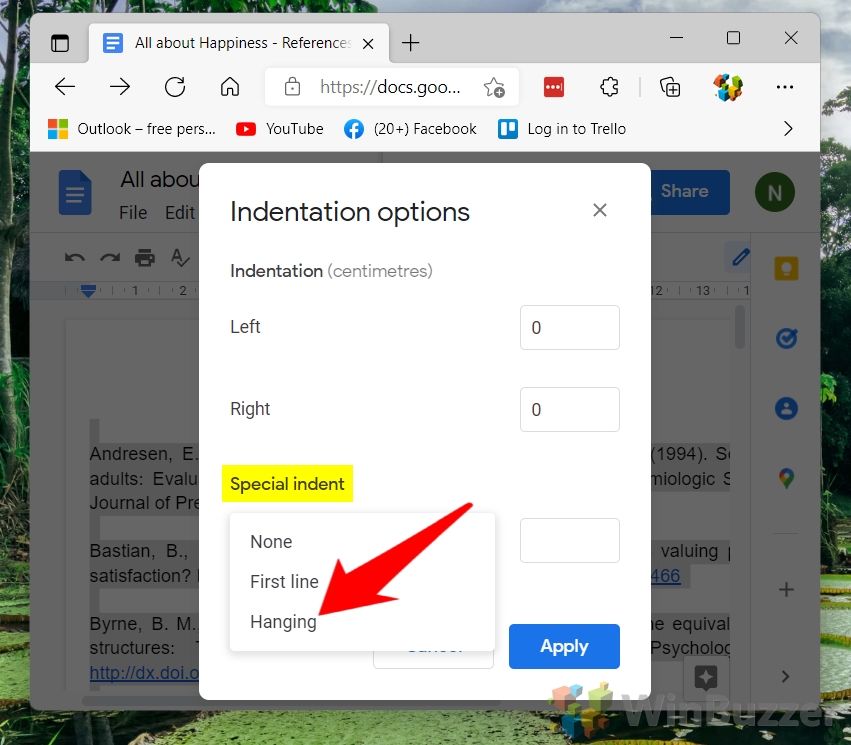
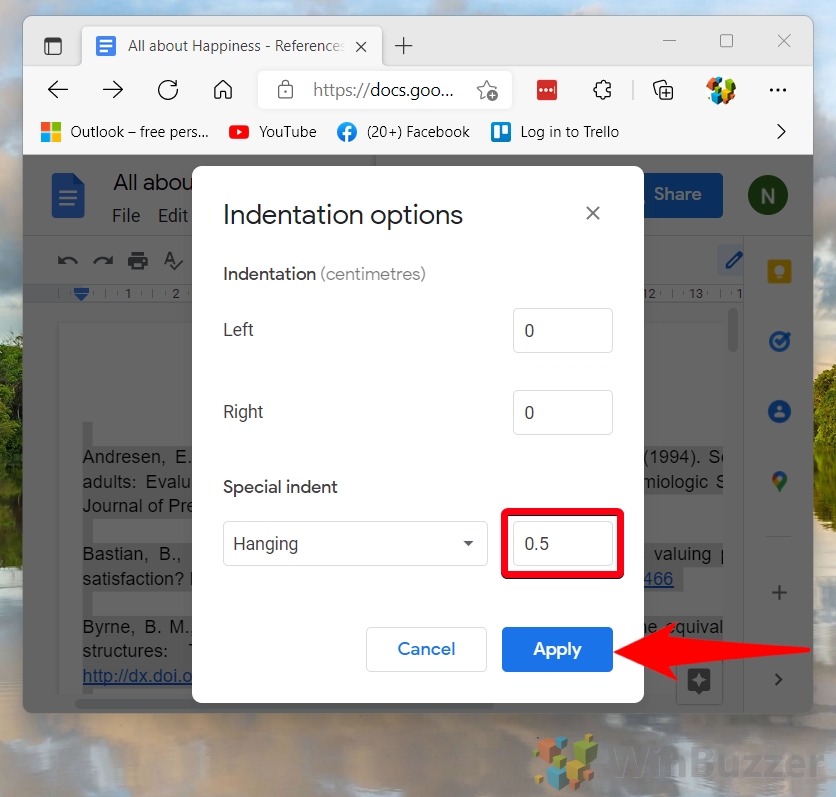
How to Make a Hanging Indent on Google Docs via the Format Menu
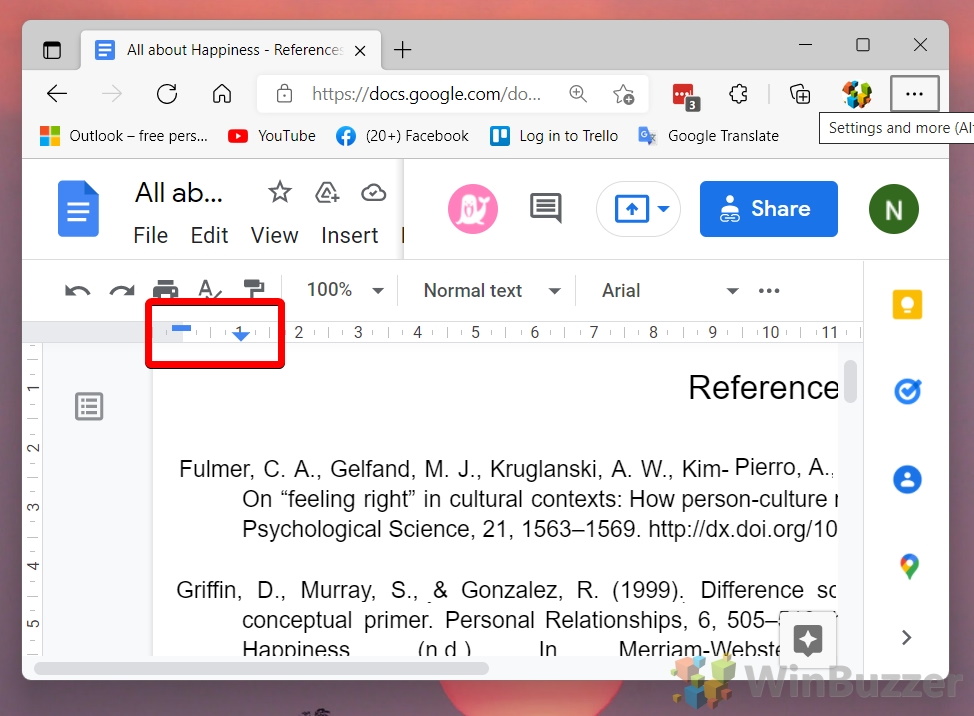
How to Indent the Second Line in Google Docs with the Ruler
Google Docs: How to Make a Hanging Indent with a Keyboard Shortcut
Extra: How to do a Hanging Indent in Microsoft Word
Now that you know how to make a hanging indent on Google Docs, you may want to learn the same for Microsoft Word. You can do so by following our dedicated guide.
Extra: How to Change Default Line Spacing and Font Size in Google Docs
If you’d rather continue with Google Docs, you’ll likely need to make further formatting changes before your paper meets standards. Here’s how to change default font style, line spacing, and font size to match your style guide.

